Petersen Art Center Hand Building
September 2025, Thursday 1:30 PM or Friday 6:30 PM
If you are interested or planning to attend this class, please fill out this form. It will help me prepare.
Relief is a sculptural method where sculpted pieces are bonded to a solid background of the same material. The technique gives the impression that the sculpted subject sits above the background plane. When rendered in solid materials such as stone or wood the maker lowers the background material to elevate the subject above the ground. Accomplishing this effect in clay, often called relief modeling, is much easier. The clay artist can adds clay to the surface in addition to removing it from the background. Relief sculpture appears in different degrees ranging from bas (low) to high. In bas relief, the subject projects less than half of its depth from the surface. In high-relief, the figures are deeply undercut to distinguish or pull them away from the background.
I’ve created a Pinterest collection showcasing all kinds of relief carving examples of different complexities and depths. I also recommend that you take a look at Victoria Ellis’s mesmerizing video showing her process and this instructional video outlining how to create a carving plan. Relief sits somewhere between drawing and sculpting but it does not use line to create imagery. Instead it relies on the manipulation of light and shadow playing on contour and form.
Recommended Clays available from Petersen Art Center: In general, you will want a smooth, grit-free clay for this process. For smooth surfaces, B-Mix, Porcelain, or for a slightly coarse but still workable clay choose Long Beach White or even Death Valley. Bear in mind that dark clay may obscure shadows and hence interfere with the modeling process.
Optimal clay temperature is hard leather hard.
Recommended Tools: you will need
- a sketchbook and pencil
- water soluble marker
- waterproof board with a smooth surface slightly larger than your piece
- ruler
- scoring tools (serrated rib, wire brush etc)
- round paint brushes, and
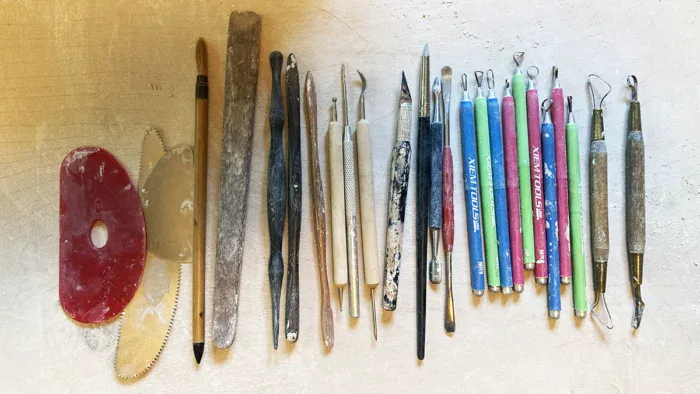
- whatever sculpting tools you prefer such as: carvers, loop carvers, finishing/wipe outs, spatulas, wood knives, ribbon tools, wire tools, dental picks, ball stylus, wood sculpting knives, metal bristle brush, and an x-acto blade. Any and all combinations of these tools can be handy, but by no means are all of them necessary. These are the tools I rely on the most:
Week 1: 6 x 6 Ceramic Tile
Bring your tools, your sketchbook, a pencil, and several physical (not on your phone) images at least 6×6 inches.
- Create a 6 x 6 x 1/2 inch slab for your tile
- How to develop imagery for relief carving
- How to create a modeling plan based on your selected image
- Transfer your image to your tile and begin working.
Downloads: 6×6 Tile Worksheet | Simple Line Drawings
Week 2: Finish your tile, prep slab for an 8 x 10 Wall Hanging
Bring your tools, your sketchbook, a pencil, and several physical (not on your phone) images at least 8 x 10 inches.
- Create 8 x 10 x 1 inch slab for your wall hanging
- Develop your imagery for your wall hanging and create a carving plan
- Finish your tile from Week 1.
Downloads
Week 3: 8 x 10 Wall Hanging
- Carve out the back of your 8×10 slab and create hanging mechanism
- Transfer your image to your slab
- Begin modeling your relief sculpture.
- Pitfalls and perils: the art of moisture management and concerning variations in clay thickness.
Week 4: 8 x 10 Wall Hanging
- Finish modeling your wall hanging
- Drying considerations